How to sell custom made furniture on Shopify in 2023
Sep 6, 2023
Selling Custom Furniture Online: A Guide to Boost Your Shopify Store’s Success
Selling custom furniture online has always felt like a challenging endeavor for e-commerce entrepreneurs. One reason is the daunting task of managing a multitude of customizable options, such as fabric color or wood type. Another challenge is handling lengthy build times with online customers, which can be exacerbated by rigid payment systems. However, I’m here to tell you that these barriers should not deter you from achieving online success.
At Hypehound, we’ve assisted numerous successful furniture stores in enhancing the buying experience for their custom furniture on Shopify. Online Quality Woods serves as a prime example of a thriving Shopify store focused on custom handmade furniture crafted by local Amish artisans. With highly customizable products that entail extended delivery times due to on-demand production, Quality Woods partnered with Downpay, an app designed to create a seamless purchasing experience for their customers during Shopify’s checkout process.
By following this comprehensive guide, you’ll be equipped to establish a robust online presence for your store and improve conversion rates and average order values by offering customers a streamlined checkout process without the need to contact your sales team merely to place an order.
Overview
In this guide, we’ll walk you through the following steps to set up your custom furniture business on Shopify:
- Creating your Shopify store and connecting your domain
- Selecting a theme that suits your business
- Adding products and customizing options
- Offering partial payment options to manage build times
Creating your Shopify store and connecting your domain
The initial step to selling your custom furniture online is to create your Shopify store. Shopify is a robust e-commerce platform that facilitates the seamless creation and management of online stores. You can start with a free trial and then subscribe for just $1 per month for your first 3 months.
- Visit Shopify.com and click “Start free trial.”
- Fill out the form in order to create your first store.
- Follow the on-screen instructions to configure your account and preferences.
- Once your store is ready, you can access it from your Shopify admin dashboard.
You will also need to connect your domain or purchase one. Follow these steps:
- If you purchased your domain name through Shopify, it will automatically be connected to your store.
- If you have an existing domain name from another provider, you will need to transfer or connect it to Shopify. Detailed instructions can be found here.
- Once your domain name is connected, you can customize it from the Domains section in your Shopify admin.
Selecting a theme that suits your business
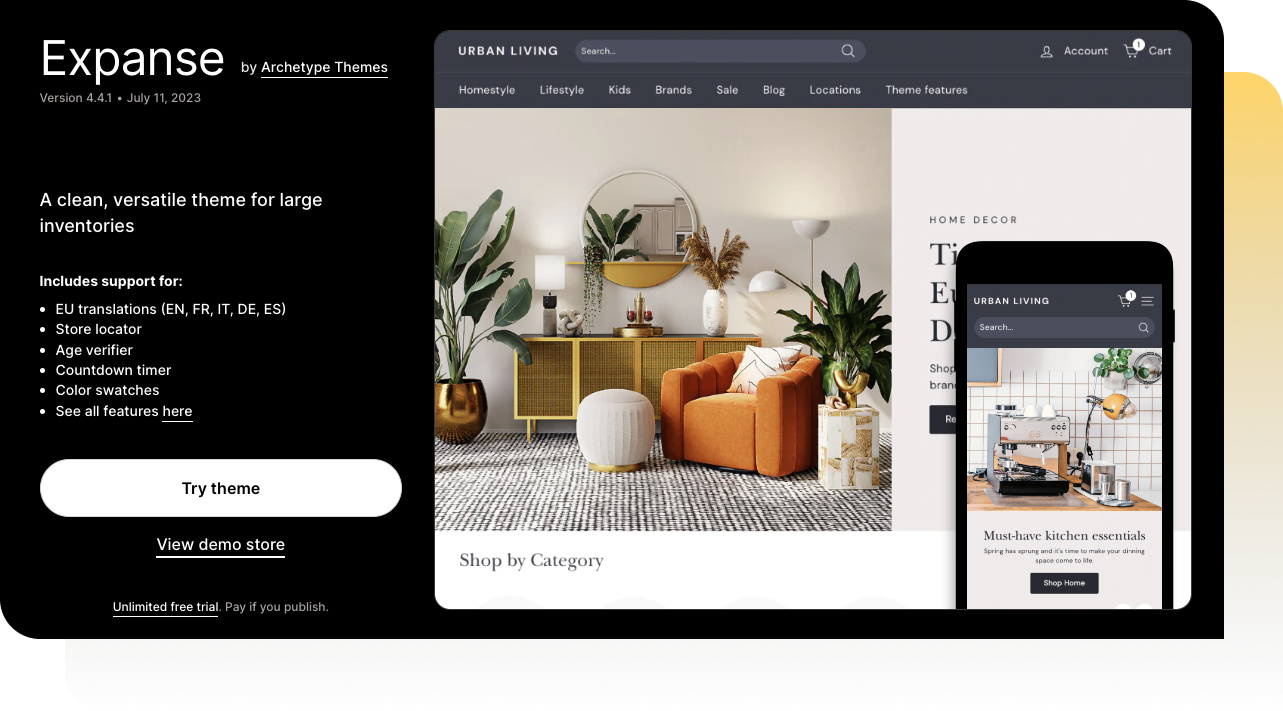
The next step is to choose a theme that aligns with the style and ambiance of your custom furniture business. A theme encompasses a collection of templates and settings that define the visual identity of your online store. Shopify offers a wide array of free and paid themes available in the Theme Store.
Certain themes, like Expanse by Archetype, are specifically tailored for extensive product catalogs and are well-suited for businesses in the home furnishings sector.
To select a theme, follow these steps:
- Visit the Theme Store and explore various categories and filters to find a theme that meets your requirements. You can also preview each theme’s appearance on different devices and screen sizes.
- Once you identify a suitable theme, click “Add theme” to install it on your store. You can also experiment with different themes before making a final decision.
- After installing a theme, customize it using the Theme editor in your Shopify admin. You can modify colors, fonts, images, layout, and more to align it with your brand and product offerings.
Adding products and customizing options
The subsequent step involves adding your products and configuring customization options for your store. Products represent the items available for sale on your online store, while options encompass the various variations or customizations that customers can select for each product, such as fabric color, wood type, size, and more. To add products and their customizations, adhere to these guidelines:
- Navigate to the Products section in your Shopify admin and click “Add product.”
- Enter the product details, including title, description, price, images, and more.
- To introduce custom options to your product, scroll down to the Variants section and click “Add variant.” You can add up to three options per product, each with up to 100 variants. For instance, if you offer a sofa with two options (fabric color and wood type), you can create up to 100 combinations of those options (e.g., blue fabric with oak wood, red fabric with walnut wood, and so on).
- If your products require more than three options or exceed 100 variants per product, or if you wish to provide more complex customizations, such as text input, file upload, conditional logic, and more, consider using an app like Dynamic Product Options. This app allows you to create unlimited options and variants for your products with advanced features and functionality. Try this app here.
- After adding all the desired products and custom options, click “Save.”
Offering partial payment options to manage build times
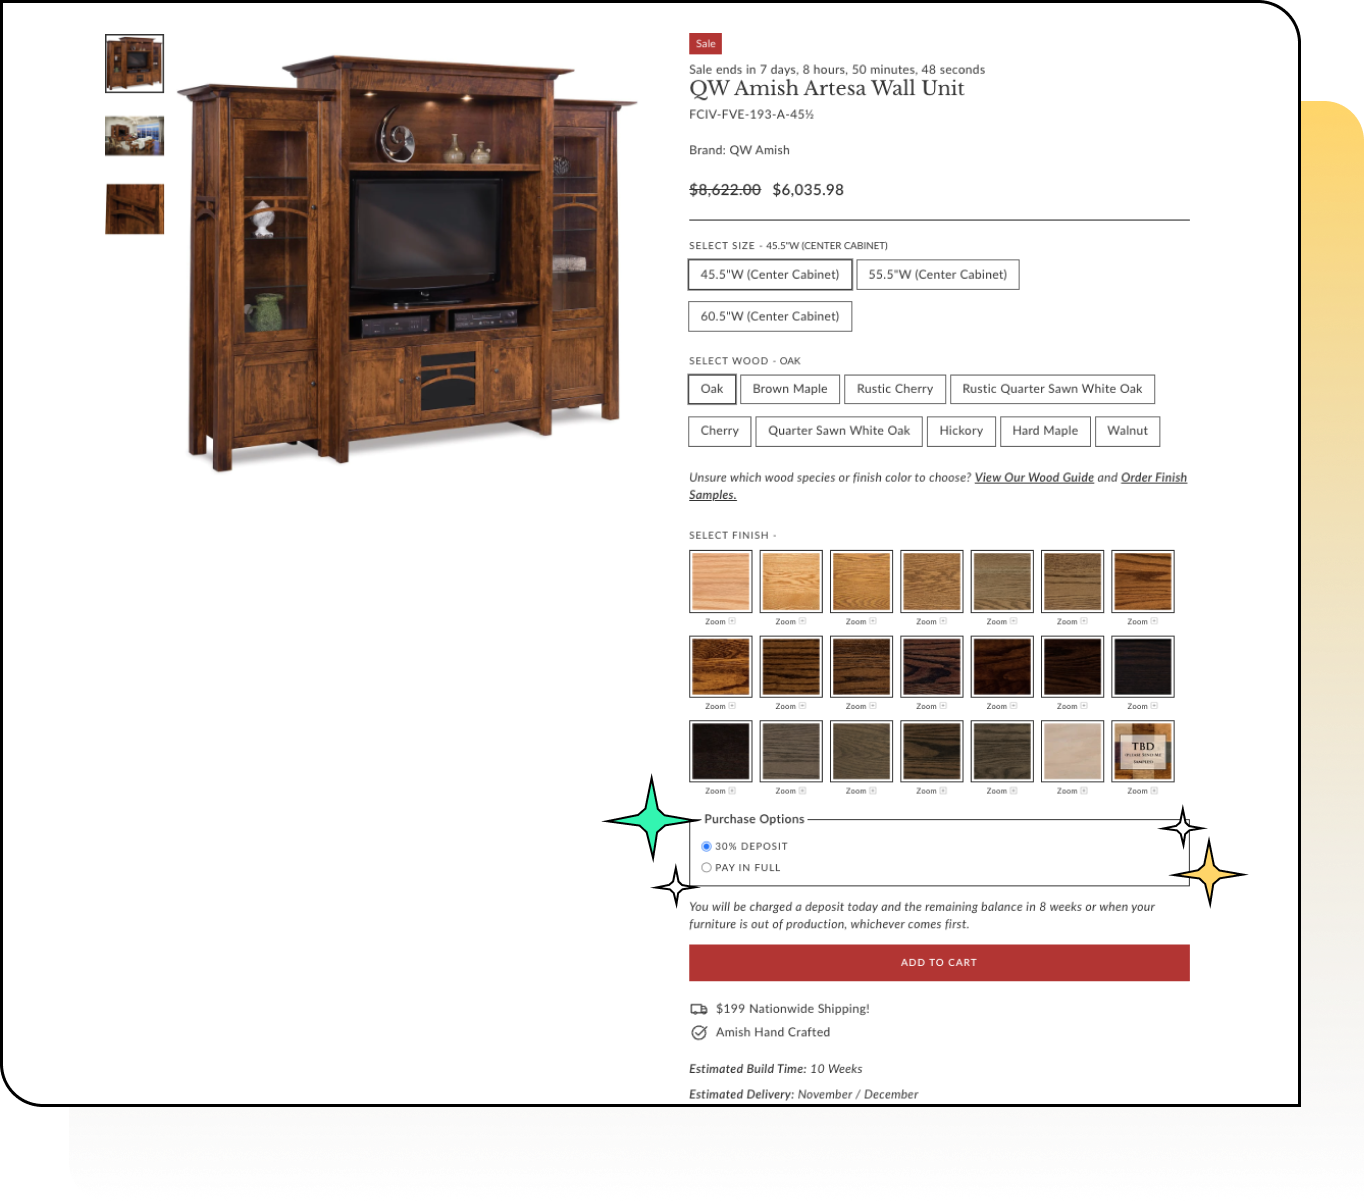
The final step involves managing build times and addressing delivery delays. The most straightforward approach is to offer partial payment options while transparently communicating estimated delivery times to your customers. Downpay is an app designed to facilitate these tasks, enabling customers to secure their orders and allowing you to collect payment from the card on file when orders are ready for shipment. This minimizes friction for customers who may be hesitant to make upfront payments for orders with extended lead times and also helps with affordability.
To provide partial payment options for your products using Downpay, follow these steps:
- Install Downpay from the Shopify App Store here.
- Launch the Downpay app within your Shopify admin and initiate the onboarding guide to configure the theme blocks. Customize the Downpay theme block options to align with your business.
- Create your initial purchase option in Downpay and configure settings such as deposit amount and release date. Select the products you wish to make this option available for.
- Click “Save,” and the partial payment option will be accessible on your storefront.
To conclude, venturing into the realm of selling custom furniture online need not be an intimidating undertaking. With Shopify and its extensive app ecosystem, you can establish a captivating online store that showcases your unique products and provides a seamless shopping experience for your customers. Easily incorporate product options, variants, and customizations, and enhance your sales and customer satisfaction by offering partial payment options through Downpay. By following this guide, you’ll be well on your way to launching or expanding your custom furniture business on Shopify.
Already have a Shopify store? Get started with Downpay today.

Diana Birsan
Co-founder, HypehoundHelping online brands sell more to their biggest fans.